Saturday, May 18, 2019

Teriyaki turkey with roasted cauliflower rice


Alright folks - I know it's been a while. During this phase of my life, I'm looking for quick, easy, tasty and convenient meals that I can prep for the entire week. This week - this teriyaki ground turnkey with roasted cauliflower rice & edamame was born. 


Do I know the nutritional value? Nope. I don't count calories, macros, etc. If you're ever curious of how I've been able to lose my postpartum weight within 6 months, just message me and I'll share my story. For now, let's dive into this yummy recipe!


Ingredients:
  1. 1 package lean ground turkey burger
  2. 1c Liquid Aminos
  3. 1/2 c Rice vinegar
  4. 1 Tbs Sesame oil
  5. 5 Tbs minced garlic
  6. 1/4 tsp ground ginger
  7. 1 & 3/4c sugar
  8. 1/4 c brown sugar
  9. 1 Tsp black pepper
  10. 1 Tsp sesame seeds
  11. 4 Tbs corn starch 
  12. 1/2 diced yellow onion
  13. 1/2 diced red bell pepper
  14. 1 package fresh cauliflower rice *
  15.  Olive Oil
  16. Red chili flakes (optional)
  17. Sliced green onions (optional)

* link to the brand I bought.

Directions:
  1. Preheat oven to 350F. Pour cauliflower rice on a greased cookie sheet. Bake approximately 20 minutes until golden. 
  2. While cauliflower is baking, warm pan over medium-high heat to prepare Teriyaki sauce. Add sesame oil, minced garlic, and ground ginger to the pan and fry until fragrant, about 1 minute. 
  3. Pour in liquid aminos, rice vinegar, white sugar, brown sugar, and black pepper. Cook until boiling, stirring frequently. Once boiling, turn down to low and allow to simmer for 10 minutes. 
  4. In small container, mix corn starch and 2Tbs water. Mix corn starch and water mixture into the Teriyaki sauce and allow sauce to simmer another 5 minutes. 
  5. Warm large skillet with some oil. Add yellow onion and red pepper and cook until translucent, approximately 2 minutes. Add ground turkey, crumbling and mixing with spatula. Cook until browned.
  6. Add approximately 1/4c-1/2c of sauce to ground turkey and mix well. 
  7. To assemble bowls: place cauliflower in the bottle of a bowl and top with teriyaki ground turkey. Top with sesame seeds, green onions, and & red chili flakes to taste. Serve with vegetable of choice.
  8. Note: This recipe makes much more teriyaki sauce than needed. I poured the remainder into glass mason jar and stored in the fridge. 
Roasted cauliflower pearls/rice.


So there you have it! Enjoy! :) 

Teriyaki turkey with roasted cauliflower rice and edamame. 


Tuesday, February 28, 2017

DIY Raised Garden Beds


HOMEGROWN VEGGIES FOR DAYS!

This blog is going to be lengthy!
I've found that my previous purchase of a garage full of tools has been a blessing and a curse.  We now have some neat, farmhouse additions to our suburban house, however, the honey-do list is neverending!  Our latest project idea was to build something so we could have a garden at the house.  If you know Jessie at all you'll remember how much she loves having fresh fruits and veggies in the house!  So, we decided to give this "home grown" idea a shot and build some sort of raised garden beds.

Now, if you know me (Clint) at all, you'll realize how particular I am about projects, especially woodworking.  I've inherited all my skills from helping my grandpa through the years which have really given me the ability to come up with some neat ideas since we became homeowners last year.  We researched around and found some neat plans from Ana White Counter Height Garden Beds (pictured below).  I decided to build two 2'x8' boxes, two 2'x6' and one 2'x4'.  I also tweaked the design a bit to add more stability to each box so I've included the materials and cut list.


Here's what we ended up purchasing:

Materials List (all boards 8' length) - Total Cost Approx. $650
The reason we chose cedar mulch over regular mulch is because cedar is naturally insect repellent and doesn't fade in color near as fast.  It's about the same price depending on which brand you purchase.  We chose Texas Native because it's 100% cedar, meaning it doesn't have crummy filler pieces like pine or oak.  The same goes for cedar boards - plus it looks and smells AWESOME!  Douglas Fir is also a good choice because of the same properties but it's a decent amount cheaper than cedar, but we don't have much of that available in southeast Texas.  Whatever you use to build the garden boxes, make sure it is NOT pressure treated wood.  Over time, the chemicals used on that wood can soak into the soil and contaminate edibles.

A few days and heavy rains later, I finally got to hammer down on the box builds.  Let me tell ya, having a sliding miter saw makes a world of difference and cuts down on time!  From the materials list above I started cutting everything I needed before I started to actually build them.

Cut List
  • 4x4
    • 32 @ 32"
    • 4 @ 7 3/4" (middle bed)
  • 1x8
    • 4 @ 96"
    • 4 @ 72"
    • 2 @ 48"
    • 10 @ 24"
    • 2 @ 60", 1 @ 10", 1 @ 20" (middle bed)
  • 1x4
    • 4 @ 96"
    • 4 @ 72"
    • 2 @ 48"
    • 62 @ 24"
The plans from Ana White's website says to use all sorts of pre-drilling, guide screws, etc., but I didn't want to waste time using that so I went with a pneumatic nail gun and framing nails.  The ring shank type hold just as well as screws but if you don't have access to a nail gun then deck screws work just as well.

The build process went relatively smoothly, however the hardware cloth was a bit difficult to maneuver and staple down.  I bought 24" wide hardware cloth so I would only have to cut the length and not have to mess with the width.  


Once I got all the boards cut I began to piece it together.  For the 8' boxes I used four 4x4 on each side with twelve 24" 1x4 underneath.  I cut and stapled the hardware cloth then nailed the 1x4 boards for added stability.  I also nailed 1x4 boards between each leg 24" from the top of the box to make them more stable.  The 6' boxes took three 4x4 on each side and eight 24" 1x4 underneath (pictured behind the 8' box).  The 4' box was the easiest to build with four 4x4 and six 24" 1x4 (bottom picture).


We really only had one area of our backyard that made sense for a garden and that happened to be the most complicated, unlevel, non-square (go figure) section of the yard.  Our backyard is graded in a way that rainwater flows toward the house, levels out about 12 feet from the back of the house, then flows around each side to the drains by the street.  So here I discovered problem numero uno.

From here it took several attempts placing the boards and finished boxes to figure out where I needed to cut out the grass.  If it wasn't one thing it was another - story of my life!


We knew we wanted some sort of paver separating the garden area from the rest of the yard, and this ultimately led to the most backbreaking part of the project.  I know if I just put pavers on top of the grass it would cause water to puddle up and eventually backflow toward the house - no bueno!  I knew my only option was to dig down the height of the paver to allow water to flow over everything and out to the street.  I ended up renting a sod cutter and flatbed trailer from Home Depot.  The sod cutter has depth options so I set mine to 2" (the height of our pavers) and went to work building up a nice pile of grass and clay.  The garden area measured roughly 9' wide in the rear, 12' wide in the front and approximately 18' deep on the sides.  After I piled it all up I started to kick myself - why didn't I wheelbarrow it around to the trailer as I pulled it up?!?!  *Sigh* lesson learned!  Cooper was obviously laughing at my mistake!


Now that I got all the grass and weeds out I wanted them to stay out.  I put down some Sta-Green Premium Landscape Fabric and tacked it all down with fabric pins that way the grass and weeds wouldn't grow up through the mulch.  I brought the garden boxes to the back yard so I could place pavers and stepping stones where I wanted them.  


After I placed the stepping stones and brick pavers I realized I bought WAY too many, so back to Lowe's it was to return them!

We originally had a vision to fill the garden bottom with gravel, but, after seeing the cost and how many trips with a wheelbarrow it would take me, we decided against that (Hallelujah!) and instead picked out some cedar mulch.  The cedar mulch has the same insect repellent properties as the cedar boards, and again, it smells amazing!


Once I got all the mulch put in and leveled, I went ahead and built the middle garden bed.  We chose to have this one sitting on the ground so it would be easier to maneuver around and give some contrast to the taller boxes.  Jessie decided it will be filled with different berries (yum!).  The corners aren't 100% square on this one because I wanted it to be the same shape as the whole area but that's not a big deal - it will hold up just fine.


I put all the raised boxes back inside, leveled them in the mulch and VOILA!  Finished!  I'm extremely happy with how this turned out.  Without counting the days I got rained out, it took about 3 days to finish it all, including my numerous trips to Lowe's and Ace Hardware.  Here's the finished project (a fence and gates are soon to come!) - it's obvious Cooper loves it too.  Garden bed, dog bed, it's all the same.  Thanks for reading!


Sunday, February 26, 2017

Clean Eats!


Hey Friends!! I know it has been a while since my last post. I promise, I've been prepping! I've also been renovating my house, raising 4 rescue pups, working full time as a PA, coaching my current challengers, reading/studying nutrition, & spending time with my husband. Phew! Busyyyyy It's the sole reason why its CRUCIAL that I meal prep!

I recently started reading the book "How to End Diabetes" by Dr. Furhman. I'm stepping into this new diabetic educator role at work and to be honest, it's blown my mind! He has this concept of "Eat to Live" which is actually the title of another book. I highly recommend looking it up, or his website. I've tried to adopt some of his practices because how can I possibly tell patients/challengers to do something if I'm not doing it, too?! So lets dive in - this weeks theme is EAT FRESH.


I first went to the grocery store and got SO much produce to put on salads, eat as sides, put in smoothies, etc. I was actually quite surprised how cheap it was! Check out my spread:


I washed and dried all of my produce and then got to work. I chopped up vegetables and put them into containers for the ultimate salad bar. I even included vegetables I hate (mushrooms, tomatoes, tofu) because I realized I am not eating a VARIETY.


Check out this power salad! Spinach, kale, green leaf lettuce, tomatoes, garbanzo beans, corn, carrots, bell pepper, radishes, cucumbers, avocado, purple cabbage, carrots, red onion, mushrooms, celery and tofu. I am not usually a fan of tomatoes, tofu, or mushrooms, but when you mix it in a massive salad, WOW. My taste buds go nuts. I literally CRAVE salads. Nutrient dense salads. I dont measure or portion size - if its a fruit or vegetable its fair game!


Another way I'm making sure to fill my diet full of fruits and veggies is a smoothie bowl! There's sooo many recipes out there! Today I had kale, spinach, strawberries, mango, kiwi, chia seeds, banana, coconut, & almond milk. 


I couldnt believe how filling it was.

Now, for meals this week. I plan on having those salads daily for lunch. For dinners, I'll be eating Spaghetti squash and fried rice.

Both of the recipes were a way to hide so many more veggies. SO if you have a picky eater, hide them!

Spaghetti squash:
1. Cut the squash in half, scooped out seeds, and baked at 400 degrees for 30-40 mins until tender.
2. While that baked, start the pasta sauce. In a sauce pan, add mushrooms, onions, bell peppers, chicken broth, minced garlic, and herbs (parsley, basil, oregano). Cook until veggies were tender and then add your favorite pasta sauce (Side note: this summer I'm so geeked to have my own garden so I can make my own sauce!). I also added some leftover shredded chicken to the sauce to add some more protein also. I cooked sauce on low until spaghetti squash was done.
3. Once squash is done, shred with a fork and place into meal prep containers. Top with pasta sauce.


Fried rice: I modified this recipe.
1. Make 1.5c brown rice in cooker (After making this meal, I realized you could go without rice if you wanted. You could also add quinoa too)
2. Cook ground chicken ( I wanted more protein in my rice but you can make veggie friendly) Set aside.
3. Saute your fav fried rice veggies. I used 1/2 head purple cabbage, 1 chopped yellow onion, 1 chopped bell pepper, 2 chopped large carrots, 1/2c peas and 1/2c corn in olive oil. Add vegetable broth if needed so veggies dont burn. Cook 5-7 mins.
4. Add minced garlic adn ginger to veggies. Cook until fragrant
5. Add rice, chiken, and veggie mix into fry pan or wok. Add 3-4T liquid aminos and 4 beaten eggs. I recommend following the link when it says to make a well with the rice and cook eggs on the inside, then mix in. I did not do that and it took longer to cook.

I have noticed an increase in my energy since I started eating many more fruits and vegetables than normal. I'm SO excited to see where this takes me. I never aim for a specific number on the scale and my goals continuously change as I grow older. I want energy, longevity, and wellness. I want to feel good and confident. I want to love myself even on days I eat pizza and forget to work out. My goal is to live a life of balance and I'm proud to say that after years of trying and failing, I've finally figured it out. Don't take your life for granted. I'm always here to hopefully inspire you and motivate you. It's never too late to to be a stronger, healthier, better version of YOU.

Next challenge group starts in 1 week. Who's joining?!

In good health,

Jessie


Monday, November 14, 2016

Comfort food meal prep


This week's meal prep only took 1.5 hours. It was so simple and made a TON of servings. The best part, I spent $64.431 & that includes organic chicken breasts & produce. When you PLAN, you SAVE. :)


First, I threw everything into the slow cooker.

Slow Cooker Chicken Pot Pie 
Recipe HERE

Ingredients:
  • 1 pound boneless, skinless chicken breasts
  • 1 small onion, diced
  • 3½ celery stalks, diced
  • 2 (10.5-ounce) cans Campbell's® Healthy Request condensed cream of chicken soup
  • 1 cup fat-free milk
  • 1 teaspoon garlic powder
  • 1 teaspoon dried thyme
  • ½ teaspoon salt
  • ½ teaspoon black pepper
  • 1 (16-ounce) bag frozen mixed vegetables, thawed
  • 2 tablespoons chopped fresh parsley
  • 1 (12-ounce) can Pillsbury® Grands!® Jr. Golden Layers Flaky Biscuits


** instead of using Grands biscuits, I made dumplings :) **


Next, I started this skillet meal. It was actually very quick!

Basil Pesto Chicken Pasta 
Recipe HERE

INGREDIENTS
  • 2 cups dried orecchiette pasta
  • 1/4 cup sundried tomatoes in olive oil, julienned
  • 2 garlic cloves, thinly sliced
  • 1/2 large onion, diced
  • 1/2 teaspoon crushed red pepper flakes (if you're sensitive to spice, you might want to start out with 1/4 teaspoon)
  • 1 chicken breast, cubed
  • 4 tablespoons basil pesto (homemade or store-bought) - see note below
  • 1 cup broccoli, blanched
  • 1/2 teaspoon kosher salt
  • 1/4 teaspoon ground black pepper
** Feel free to use whole grain or veggie noodles**


Lastly, I made this meal. While the meatloaf muffins were cooking, I used that time to clean up all my dishes. 

Turkey meatloaf muffins 


Ingredients:

  • 1½ pounds lean ground turkey
  • 1 egg
  • 2 egg whites
  • ½ cup Italian breadcrumbs
  • ½ cup onion, diced
  • ½ cup green pepper, diced
  • ½ cup carrot, grated
  • ½ cup low sugar tomato ketchup
  • 1 teaspoon Dijon mustard
  • 2 teaspoons minced garlic
  • 1 tablespoon Worcestershire sauce
  • 1 teaspoon onion powder
  • ½ teaspoon salt
  • ½ teaspoon black pepper
I paired mine with broccoli & red skinned mashed potatoes! 


Since I'm just cooking for my husband and I, these recipes made PLENTY to last the week. Snacks consist of side salads, apples, grape fruits, AdvoBars, mixed nuts, & Greek yogurt.

I'm so chilly here in Texas. Theses dishes will be the ultimate HEALTHY comfort foods. Happy Prepping!  


1 week meal prep for 2!

Day
Breakfast
Lunch
Dinner
1
Meal Replacement
Zucchini Casserole  (6)

Turkey Meatloaf (6)

2
Meal Replacement
Turkey Meatloaf (6)
BBQ chicken stuffed sweet potatoes (6)

3
Meal Replacement
Slow Cooker Enchiladas (6)

Zucchini Casserole  (6)

4
Meal Replacement
Slow Cooker Enchiladas (6)
BBQ chicken stuffed sweet potatoes (6)
5
Meal Replacement
Zucchini Casserole  (6)

Slow Cooker Enchiladas (6)
6
Meal Replacement
BBQ chicken stuffed sweet potatoes (6)
Turkey Meatloaf (6)
7
Meal Replacement
Out of town
Out of town
*We are going out of town, but find a meal with 4 servings and plug into 2 remaining slots!*


Cheesy Zucchini and Turkey Casserole

 Ingredients
                     2 tablespoons olive oil
                     1 lb ground turkey
                     ½ cup diced onion
                     2 cloves garlic, minced
                     1½lbs of zucchini, diced
                     2 cups prepared groats (or brown rice, quinoa, etc.)
                     1 can diced tomatoes
                     ½ teaspoon dried oregano
                     ½ teaspoon smoked paprika
                     ½ cup finely chopped fresh basil
                     7 oz Kerrygold aged cheddar, shredded

** I used brown rice** 


Fool Proof Turkey Meatloaf

Ingredients
                     1 pound extra-lean ground turkey breast
                     ¼ cup plus 2 tablespoons ketchup
                     1 teaspoon Worcestershire sauce
                     2 garlic cloves, minced (1 tablespoon)
                     1 large egg
                     1/3 cup plain breadcrumbs
                     2 tablespoons grated Parmesan cheese
                     1 teaspoon dried thyme
                     1 teaspoon dried oregano
                     ½ teaspoon salt
                     ¼ teaspoon freshly ground black pepper


BBQ chicken stuffed sweet potatoes (6)

Ingredients

For The Barbecue Chicken:
  • ·         2 lbs boneless, skinless chicken thighs or breasts
  • ·         ½ cup water or chicken broth
  • ·         ½ teaspoon sea salt
  • ·         ¼ teaspoon black pepper
  • ·         2 cups Smoky Spicy Barbecue Sauce from Get Sauced (you can also substitute the Sweet Barbecue Sauce if you prefer)


For the Sweet Potatoes:
  • ·         6 medium sized sweet potatoes or yams


For the Garnish (optional):
  • ·         Chopped red onion
  • ·         Chopped cilantro
  • ·         Avocado


Slow Cooker Enchiladas (6)

Ingredients
  • ·         2 half chicken breasts on the bone with skin (remove skin before adding to enchiladas)
  • ·         1 (16 ounce) jar red enchilada sauce (no sugar added) (Quick & Easy Enchilada Sauce recipe)
  • ·         1 (4 ounce) can green chile peppers
  • ·         1/2 teaspoon garlic powder
  • ·         1 teaspoon cumin
  • ·         1 teaspoon chili powder
  • ·         1/2 teaspoon black pepper
  • ·         1 1/2 cups shredded cheddar cheese, reduced fat
  • ·         1 (8 oz.) container sour cream, fat free
  • ·         6 medium whole wheat tortillas, low sodium if possible (corn tortillas are not recommended as they tend to fall apart) Homemade Whole Grain Tortillas Recipe


Sunday, October 30, 2016

7 day meal prep for 2!

Hey friends! Tomorrow starts day 1 of my 24 Day Challenge and so I will be LASER FOCUSED with prepping. I decided to share with you my meal plan & grocery guide over the course of the next 24 days. This blog contains the first week (cleanse approved meals).


Like every week, I search online to find well balanced recipes, and then I plug them into a calendar. I'm a visual person, so this really helps me figure out how many meals I need.


From there I created my grocery list. 


INGREDIENTS

  1. ¾ cup freshly grated Parmesan cheese
  2.  2 teaspoons paprika
  3. 1 tablespoon chopped fresh parsley
  4. ¼ teaspoon sea salt
  5. 1 tablespoon extra virgin olive oil
  6. 4 cod filets (about 6 oz. each)
  7. lemon, cut into wedges
  8. Broccoli 


INGREDIENTS
  1. 10 Oz Fresh Spinach (or frozen Spinach, defrosted and excess water removed)
  2. 1.25 lbs 93/7 Ground Turkey
  3. 1 Large Egg, beaten
  4. 1/2 Cup Oat Flour or Breadcrumbs
  5. 3/4 Cup Onions or Green Onions, finely chopped
  6. 1 Tbsp Garlic, finely chopped
  7. 1/2 Tbsp Dried Parsley (or 1.5 Tbsp of Fresh Parsely, chopped)
  8. 2 Tsp Olive Oil
  9. 1/2 Tsp Oregano
  10. 1/4 Tsp Red Pepper Flakes
  11. Salt & Black Pepper to taste
  12. Cooking Spray
  13. Optional: 1/2 Tbsp Brown Sugar or Honey (recommended if using oat flour)
  14. Frozen/Fresh veggie as side (I used broccoli)
  15. Whole grain pasta (make sure to measure portion size! :) ) 
  16. Low sugar/low sodium pasta sauce 


INGREDIENTS 
  1. 2 1/2 (14.5 oz) cans low-sodium chicken broth (4 1/2 cups)
  2. 1 (14.5 oz) can petite diced tomatoes
  3. 1 1/4 cups finely chopped yellow onion
  4. 3 cloves garlic, minced
  5. 1 Tbsp chili powder
  6. 2 tsp ground cumin
  7. 3/4 tsp paprika
  8. 1/2 tsp ground coriander
  9. Salt and freshly ground black pepper, to taste
  10. 1 1/2 lbs boneless skinless chicken breasts
  11. 1 (14.5 oz) can black beans, drained and rinsed
  12. 1 1/2 cups frozen corn
  13. 1 Tbsp fresh lime juice
  14. 1/4 cup chopped fresh cilantro


For serving:
  1. Tortilla strips or tortilla chips **OMIT IF ON CLEANSE**
  2.  Shredded cheddar or monterey jack cheese **OMIT IF ON CLEANSE**
  3. Diced avocado, diced roma tomatoes, sour cream/plain greek yogurt (optional)


·         

Layer bottom to top:Bolthouse Farms Greek yogurt dressing or vinaigrette of choice. 
Chopped Veggies of Choice (I did tomatoes, peppers, onions, carrots)
Romaine/Green leaf/Spring mix (Whatever is on sale. I got a head of Organic Green leaf lettuce for $1.50)


INGREDIENTS

1. 2 tablespoons olive oil
2. 1 pound chicken thighs, boneless and skinless, sliced into strips
3. 1/3 cup sun-dried tomatoes, drained of oil, chopped
4. 1 pound asparagus, ends trimmed, cut in half, if large
5. 1/4 cup basil pesto
6. 1 cup cherry tomatoes, yellow and red, halved


INGREDIENTS
  1. 1 pound ground chicken
  2.  1 1/2 cups uncooked quinoa, rinsed
  3. 1 can (15-ounce) black beans, drained and rinsed
  4. 1 cup frozen corn
  5.   1 can (15-ounce) diced fire roasted tomatoes
  6.  2 cloves garlic, minced
  7. 1 medium onion, chopped
  8. 1 or 2 jalapeno peppers, finely chopped (depending o the heat level you want)
  9. 1 cup water
  10. 1 can (10-ounces) enchilada sauce
  11.  2 tablespoons Mexican chili powder
  12. 1 tablespoon cumin
  13. 2 teaspoons ground coriander
  14. 1 cup shredded Mexican blend cheese
  15. 3 green onions, chopped
  16. 1/4 cup fresh cilantro, chopped

I compared grocery list to what I had in my pantry/freezer, and went shopping. Here was my grocery haul. All of this food for $77!


To start, I put the ingredients to the Tortilla soup in the slow cooker.

This is a picture when its done 

Next, I started the Parmesan crusted cod with broccoli and put it in the oven.

Finished! I sampled a piece, its sooooo gooooood! 
While that was cooking, I threw some brown rice & frozen veggies (peas and carrrots) in my rice cooker with chicken broth. I am following the 24DC guide, and so I am trying to eat a veggie, protein, and complex carb with every meal. If you dont have a rice cooker, you can do the same in a pot on the stove. 


While the fish, broccoli and rice cooked, I started prepping for my turkey spinach meatballs. 

Finished product! 
The cod only took 15-20 mins to cook, and so I was able to throw the meatballs in the oven right after. Boil your water for pasta, add your sauce to cooked & drained noodles, and then throw your food in containers.

**Meal prep hack** Put frozen veggies in your container as a side. When you microwave your food, it will steam your veggies. 

Next up : One pan chicken pesto. This was extremely easy to make! 


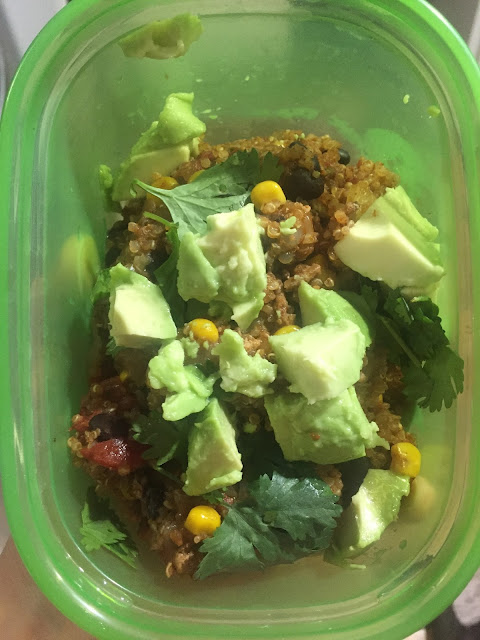
Lastly, I made the enchilada quinoa slow cooker meal. In hindsight, I should have started this at the beginning with my other slow cooker meal and had them both cooking at the same time. 


And there you have it! 7 days of meals for 2!

If you'd like, you can also buy the grocery list and cook each meal before dinner and have the left overs for lunch. With Clint working 24H shifts at the fire station and with me working 10s at the urgent care, that is not feasible. 


Well, we are prepped and ready for this challenge! Tune in next week for another meal plan.